Creating a TensorFlow Object Detector Capsule
Introduction
In this tutorial, we will walk through how to make a capsule using an existing model trained with the [Tensorflow Object Detection API] [TensorFlow detection model zoo]. You can find the complete capsule on our GitHub repository.
Setup The Environment
See the previous tutorial for information on setting up a development environment.
A TensorFlow Face Detection Capsule
File Structure
As in the previous tutorial, we will begin by creating a new folder called
detector_face, a meta.conf and a capsule.py.
You will also need to put the existing TensorFlow model and the metadata in
the directory. For this tutorial, they will be named detector.pb and
dataset_metadata.json. Download the detector.pb and dataset_metadata.json
from here. Other TensorFlow pre-trained
models can be found in the Tensorflow 1 Object Detection Model Zoo and [Tensorflow 2 Object Detection Model
Zoo]
TensorFlow 2 detection model zoo.
So now the file structure will look like:
your_working_directory
├── docker-compose.yml
└── capsules
    └── detector_face
        ├── meta.conf
        ├── capsule.py
        ├── detector.pb
        └── dataset_metadata.json
Capsule Metadata
Just as in the previous tutorial, put the version information in the
meta.conf:
[about]
api_compatibility_version = 0.3
Capsule
First, import the dependencies:
# Import dependencies
import numpy as np
from typing import Dict

from vcap import (
    BaseCapsule,
    NodeDescription,
    DetectionNode,
    FloatOption,
    DETECTION_NODE_TYPE,
    OPTION_TYPE,
    BaseStreamState,
    rect_to_coords,
)
from vcap_utils import TFObjectDetector
The capsule definition will be a little bit more complicated than the previous
one. In this capsule, we will have the threshold option. In addition, since
we are using a real backend, we will pass in a lambda for backend_loader. We
will talk more about this in the Backend section below.
# Define the Capsule class
class Capsule(BaseCapsule):
# Metadata of this capsule
name = "face_detector"
description = "This is an example of how to wrap a TensorFlow Object " \
"Detection API model"
version = 1
# Define the input type. Since this is an object detector, and doesn't
# require any input from other capsules, the input type will be a
# NodeDescription with size=NONE.
input_type = NodeDescription(size=NodeDescription.Size.NONE)
# Define the output type. In this case, as we are going to return a list of
# bounding boxes, the output type will be size=ALL. The type of detection
# will be "face", and we will place the detection confidence in extra_data.
output_type = NodeDescription(
size=NodeDescription.Size.ALL,
detections=["face"],
extra_data=["detection_confidence"]
)
# Define the backend_loader
backend_loader = lambda capsule_files, device: Backend(
device=device,
model_bytes=capsule_files["detector.pb"],
metadata_bytes=capsule_files["dataset_metadata.json"])
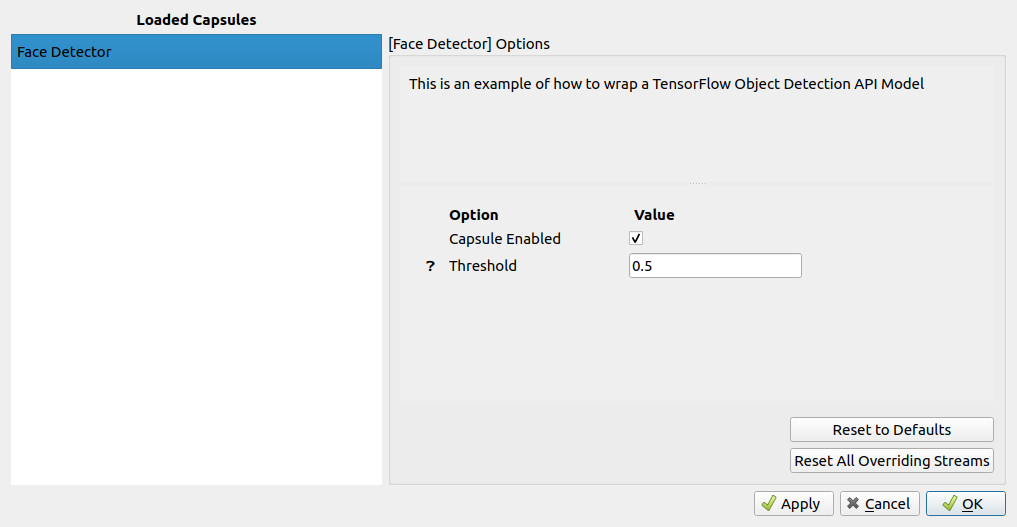
# The options for this capsule. In this example, we will allow the user to
# set a threshold for the minimum detection confidence. This can be adjusted
# using the BrainFrame client or through REST API.
options = {
"threshold": FloatOption(
description="Filter out bad detections",
default=0.5,
min_val=0.0,
max_val=1.0,
)
}
Backend
Because we are using a TensorFlow model, we are going to use a sub-class of
TFObjectDetector instead of BaseBackend. The TFObjectDetector class will
conveniently do the following for us:
- Load the model bytes into memory
- Perform batch inference
- Close the model and clean up the memory when finished
TFObjectDetector already defines the constructor, batch_process() and
close() methods for us, so we can skip defining them ourselves. We just need
to handle the process_frame() method.
# Define the Backend Class
class Backend(TFObjectDetector):
    def process_frame(self, frame: np.ndarray,
                      detection_node: None,
                      options: Dict[str, OPTION_TYPE],
                      state: BaseStreamState) -> DETECTION_NODE_TYPE:
        """
        :param frame: A numpy array of shape (height, width, 3)
        :param detection_node: None
        :param options: Example: {"threshold": 0.5}. Defined in Capsule class above.
        :param state: (Unused in this capsule)
        :return: A list of detections
        """

        # Send the frame to the BrainFrame backend. This function will return a
        # queue. BrainFrame will batch_process() received frames and populate
        # the queue with the results.
        prediction_output_queue = self.send_to_batch(frame)

        # Wait for predictions
        predictions = prediction_output_queue.get()

        # Iterate through all the predictions received in this frame
        detection_nodes = []
        for prediction in predictions:
            # Filter out detections that is not a face.
            if prediction.name != "face":
                continue
            # Filter out detection with low confidence.
            if prediction.confidence < options["threshold"]:
                continue

            # Create a DetectionNode for the prediction. It will be reused by
            # any other capsules that require a face DetectionNode in their
            # input type. An age classifier capsule would be an example of such
            # a capsule.
            new_detection = DetectionNode(
                name=prediction.name,
                # convert [x1, y1, x2, y2] to [[x1,y1], [x1, y2]...]
                coords=rect_to_coords(prediction.rect),
                extra_data={"detection_confidence": prediction.confidence}
            )
            detection_nodes.append(new_detection)

        return detection_nodes
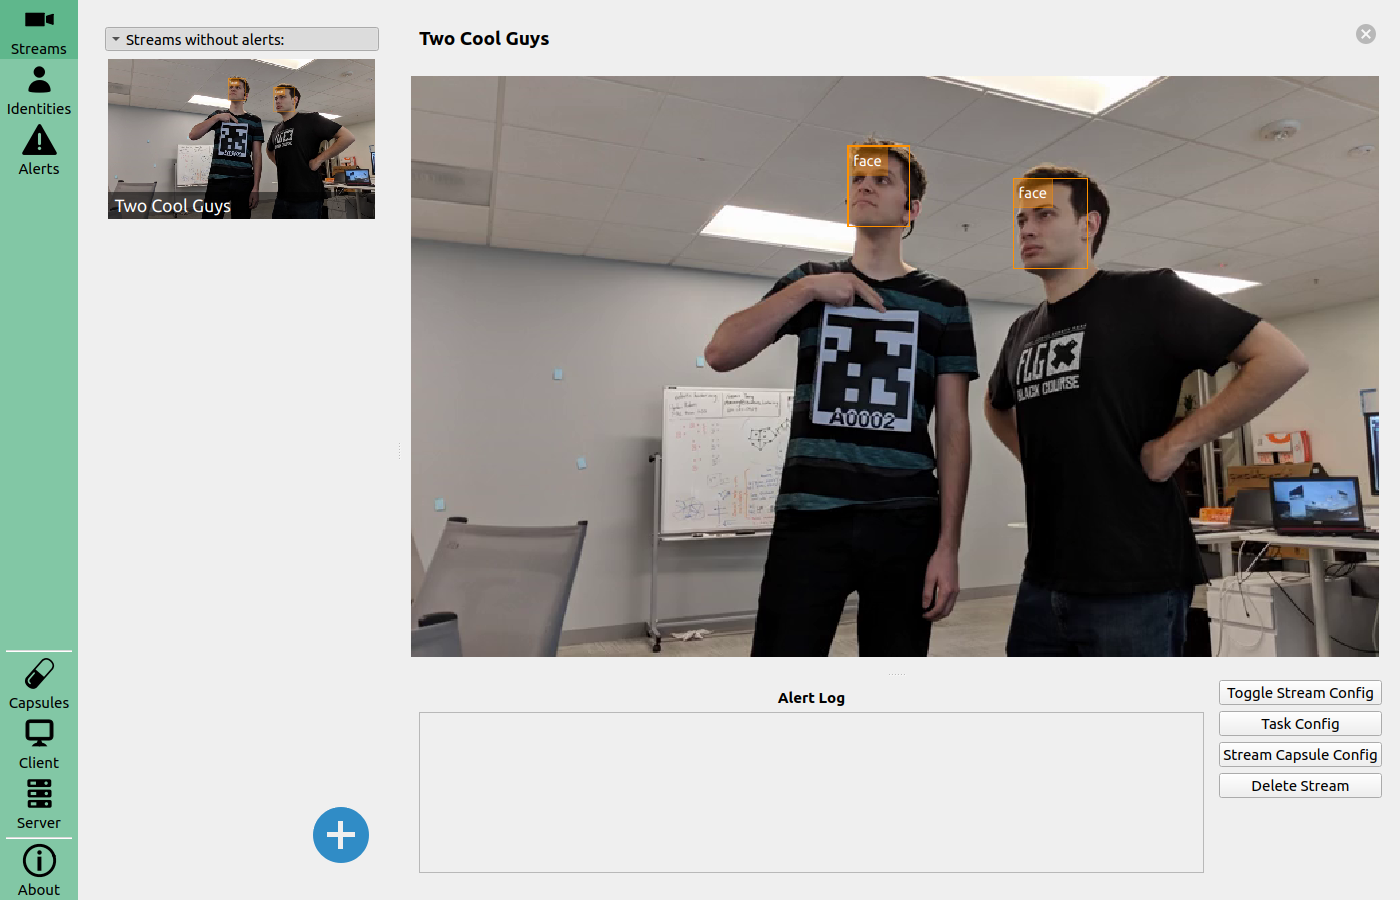
When you restart BrainFrame, your capsule will be packaged into a .cap file
and initialized. You'll see its information on the BrainFrame client.
Once you load a stream, you will be able to see the inference results.